
Tuesday, December 27, 2011
Paper piecing tutorial....better late than never!
The holidays are over and things are simmering down a bit. I feel like a human garbage can....ugh. I went to the gym this morning and felt every bite of holiday food. Anyway....
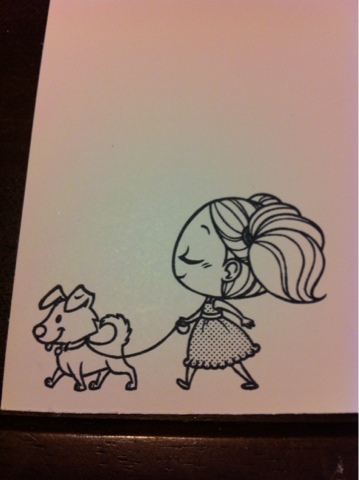
So a dear friend of mine had asked me about some paper piecing I had done and I thought I'd do a little tutorial. I'm using this ah-door-ah-bull stamp from The Greeting Farm. I stamped her on white card stock for my base and then stamped her dress on pink designer paper and I stamped the puppy again on a seperate piece of white cardstock. I cut out the dress and colored the belt. I colored the puppy with my Copic markers then cut him out. I colored my base stamp with my Copics and then glued my print dress onto the base with a glue pen. I then used foam pop dots to attach my puppy to the base being careful to line up his leash. I added an earring and a diamond tag for the pup. I adore the dimension.


So a dear friend of mine had asked me about some paper piecing I had done and I thought I'd do a little tutorial. I'm using this ah-door-ah-bull stamp from The Greeting Farm. I stamped her on white card stock for my base and then stamped her dress on pink designer paper and I stamped the puppy again on a seperate piece of white cardstock. I cut out the dress and colored the belt. I colored the puppy with my Copic markers then cut him out. I colored my base stamp with my Copics and then glued my print dress onto the base with a glue pen. I then used foam pop dots to attach my puppy to the base being careful to line up his leash. I added an earring and a diamond tag for the pup. I adore the dimension.
Wednesday, December 21, 2011
Etching is AWESOME
Merry Christmas to all!! I've been busy as a Christmas bee trying to create little gifts and keep them all secret. Today I made little ponytail holders for Gracie (my adorable sweet Yorkie) and her puppy friends: Phoebe, Chloe and Porsche. I also made flannel flower snap clips for my dear friend Carol's daughter. But my big project today was.....(drumroll please).......etching wine glasses. If you haven't tried glass etching you are in for a real treat. I predict that by the end of next week everything glass in my house will be sporting etching of some sort!
There are etching tutorials all over the web, YouTube and my most recent addiction Pinterest. I'll give you the run down for this project but if you want something more formal there are tons available.
Supplies
Wine glasses
Vinyl (I used contact paper but you could also just use masking tape)
Armour Etch Glass Etching Cream
Paint brush
After deciding on a design I used my cricut to cut it out of my contact paper. It helps to keep in mind we are making a sticky stencil. I placed my stencil on the wine glass and used a credit card as a burnisher to ensure all the edges were stuck down well. Make sure you are in a well ventilated room. Using an old cruddy paint brush, apply the etching cream in a nice, even, slightly thick layer over your stencil. Please be careful not to get any of the etching cream on your skin and follow all precautions listed by the good folks at Armour. Let your cream get to work while you have a diet coke and a Christmas cookie ....or two. Let your etching cream sit for at least 20 min and wash your glass in warm soapy water. Peel off your stencil and prepare to ooh and ahh. That's it! You just etched glass. You ROCK!
Here are my helpful hints (read as my booboos)
Don't slosh your cream on, it can splash and make etch specks.
To get a nice end result the edges must not leak. I reinforced a few of my edges with masking tape.
Small detailed designs don't work as well.
Wednesday, November 30, 2011
Selling the sizzle
Im preparing for my first craft fair in more years than I care to admit. This morning I've been packaging two items I'm bringing. One is a bottle cap magnet with our beloved LSU Tiger and the other is 4 sassy animal print marble magnets. I hope people are DRAWN to them. LMAO. I'm so sorry that was really awful but after doing all these I'm a bit punchy.
Peace, love and paper
A~

Peace, love and paper
A~
Tuesday, November 29, 2011

Monday, November 28, 2011
Ribbon ruffle
Im up late again. Gracie is shredding wet wipes as I clean my stamps. We are quite a pair :)
I made this little card tonight and I get a lot of questions about how I ruffle the ribbon so here goes:
After creating my card I place a 1/4" strip of scor-tape where I want my ribbon to go. I've used red liner tape, I just happened to grab scor-tape. I placed my ribbon down with an inch left for a tail and exposed about half of the tape. I gathered approximately 1/4 of an inch and stuck down the ribbon and repeated until the entire length was covered with 1/4 inch gathers. I secured the tails behind the card and placed a tag on the front.
Try it! Let me know how it works :)

Ready for ruffle
 |
| Strip of Scor-tape |
 |
| Take approx 1/4" tucks and stick down to tape |
 |
| Continue adding tucks or ruffels |
 |
| Secure tails |
 |
| Make any adjustments to get your ruffles even and in a mostly straight line :) |

Sunday, November 27, 2011
I love coffee and coffee filter wreaths!
I was in need of mindless craft therapy tonight and this coffee filter wreath was just the ticket. Very very inexpensive, fairly fast, mindless.
Supplies:
Foam wreath 8". I happened to have one on hand but you could easily make or repurpose a wreath.
Coffee filters (natural) I used 2 packs.
Hot glue
I first wrapped the wreath with a single layer of filters and glued them in place. I separated a coffee filter and folded it in half and then into thirds. It looks like a fluffy piece of pie at this point :). I folded the tip of the pie up and glued it with a small dot of glue to hold in place. I ran a bead of glue along the folded edge and secured it to my wreath. I established a pattern working from the top edge of the wreath to the center edge. Keep it simple. This wreath is very forgiving so do NOT stress over your folded 'pie' pieces not being straight. Here are some pics and please excuse the messy house :)
Friday, November 18, 2011
I might have gotten a little carried away...
I don't make a lot of baby cards. I'm not sure why. I'm surrounded by babies at work so you would think that would be a big inspiration for me. It's not. I asked my BFF and coworker Chasity "what goes on a onesie?" and she responded "spit up". Pretty darn accurate! LoL.
Anywho, I made this little card to welcome a little princess. I cut a folded piece of white cardstock as my card base. I then cut two separate onesies out of designer paper. I used Spellbinders scalloped circles for the neck and legs. I attached ruffled ribbon to the bottom of the back with scor-tape and tied a bow for the front. I'm still looking for a sentiment for the front. Thoughts, ideas and jokes are welcome.

Anywho, I made this little card to welcome a little princess. I cut a folded piece of white cardstock as my card base. I then cut two separate onesies out of designer paper. I used Spellbinders scalloped circles for the neck and legs. I attached ruffled ribbon to the bottom of the back with scor-tape and tied a bow for the front. I'm still looking for a sentiment for the front. Thoughts, ideas and jokes are welcome.
Saturday, November 12, 2011
Foam pop-dots are delicious
How do you run out of red card stock? I mean really? 2 weeks prior to my first Christmas Bazar and I'm out of red card stock. Today while I was making these cards Gracie was watching. At least I thought she was watching...maybe doing quality control, I'm not sure. Then the reason became perfectly clear....foam adhesives must taste like chicken because twice today I had to remove about twenty of them from her face and paws. They must smell as good as chicken because regardless of where I put them she hunted them down.
I think I need a peppermint mocha before work.
Peace, love and foam pop dots.

I think I need a peppermint mocha before work.
Peace, love and foam pop dots.
Monday, November 7, 2011
Traditional Christmas
This is the same recipe as my pink card except made with traditional colors. The poinsettias are also Martha Stewart punches. *love*
Peace, love and paper.
A~
Peace, love and paper.
A~
Dreaming of a pink Christmas
I love pink and really love it on Christmas cards. I made this card out of bright pink cardstock with Echo Park Holly Jolly Christmas designer paper. The snowflakes are Martha Stewart punches that I glittered. The design is grounded with a piece of chocolate brown rickrack from my ribbon stash.
I'm feeling all Christmas-y now :)
I'm feeling all Christmas-y now :)
Wednesday, November 2, 2011
How to make wine MORE fun
Two days ago I received my latest obsession in the mail...vinyl sheets. This stuff is seriously fun. I'm trying to resist to urge to buy more ASAP. Here's a little wine glass I decorated. The bow is detachable and has a hair clip on the back. (two for one gifts?!?). I'm planning to sell them at my upcoming Christmas bazar Dec 3. Any thoughts and suggestions are welcome :)
Peace, love and vinyl.

Peace, love and vinyl.
I glittered my iPhone
It wasn't intentional....I glittered the carpet pretty good too. Thank goodness Gracie was in bed or she might have been glittered too. I love glitter but I'm not patient enough for it. I don't know how those kiddos in kindergarten manage to glitter and then not touch it and end up with a bald spot because that's what happens to me. I tried tinsel glitter last year and did not like too much. This year I've grown and I think it might be another favorite.
I made this card thinking about all the glass ornaments we hung on the Christmas tree when I was a kiddo. They were so fragile they would break if you looked at them the wrong way They had a nice 'blop' of glitter on them too. Looks like I have a history with glitter.
Peace LOVE and paper
Andrea
I made this card thinking about all the glass ornaments we hung on the Christmas tree when I was a kiddo. They were so fragile they would break if you looked at them the wrong way They had a nice 'blop' of glitter on them too. Looks like I have a history with glitter.
Peace LOVE and paper
Andrea
Tuesday, November 1, 2011
A few little gift tags
I love making tags. Actually I love making anything small. Anyway, here's a pic! 

A little fever
So I'm too sick to be around the tiny infants we care for so I stayed under the blankets last night. I stayed there until around midnight when I remembered I hadn't checked the mail. My new lover was in my mail box waiting for me. Designer vinyl. OMG. I managed enough strength to try two techniques, punching and cricut. It cuts like butter and is so stinking cute! So today I must gather my strength and find things to put my vinyl on. Suggestions are welcome.
I'm still working on stock for the Christmas Bazar on Dec 3. I adore my new gift tags so I'm making them and the vintage cards I just completed.
All sweet comments are encouraged and welcome. This is a 'baby' blog and I have no idea what I'm doing but I'm doing it :).
Peace, Love and Paper
I'm still working on stock for the Christmas Bazar on Dec 3. I adore my new gift tags so I'm making them and the vintage cards I just completed.
All sweet comments are encouraged and welcome. This is a 'baby' blog and I have no idea what I'm doing but I'm doing it :).
Peace, Love and Paper
Wednesday, October 26, 2011
Subscribe to:
Posts (Atom)