Today's project came from work...literally. Yes, some may call me a thief....I try to look at it a little more loosely. I'm a borrow-er :). I just wanted to dress up our preemie boy's wardrobe. Especially with valentine's day right around the corner right? Right!
I made a freehand pattern out of some scrap cardstock. I basically wanted the tie to be twice as long as it was wide. Once I got the tie shape right I added a half circle on the top for a knot. I ironed my fabric to Wonder Under to create an appliqué. Then i traced my pattern to the Wonder Under paper backing. I cut out my tie appliqué then ironed it to my 'borrowed' tshirt. To make my tie look more realistic I folded the bottom edge of the knot appliqué and then ironed it in place.
How cute is this?!
Tuesday, January 10, 2012
Friday, January 6, 2012
Lost my marbles
Check this out...I made these fabulous pendants out of floral marbles.
I baked my marbles for 20 min on 350 degrees in my toaster oven. Immediately after taking them from the oven I dumped the hot marbles in ice cold water. The change in temp causes all these cool cracks to form. Science is AWESOME. I put a bead end cap and a ring on the top of each cooled marble to create a pendant.
Happy little accident
This morning I was making a thank you card for my sweet friend McKenna who was my Secret Santa at work. She left me such thoughtful gifts I wanted to give her a proper thank you.
I stamped this little Changito with Momento black and colored him with Copics to match my designer paper. Pretty cute huh? Well....I was trimming the image and cut too close the the top edge (insert colorful language here). I decided to trim around the flower and I LOVE the result! It was kind of long and boxy before I got trim happy. I think it's much more interesting now.
Embrace the imperfections in life :)
I stamped this little Changito with Momento black and colored him with Copics to match my designer paper. Pretty cute huh? Well....I was trimming the image and cut too close the the top edge (insert colorful language here). I decided to trim around the flower and I LOVE the result! It was kind of long and boxy before I got trim happy. I think it's much more interesting now.
Embrace the imperfections in life :)
Tuesday, January 3, 2012
Happy+sad=me
My sweet friend and Kaila has gotten a new job! I'm excited for her and so sad for us. Kaila is our unit secretary and so much more. Each night she is security protecting us like a momma bear, electrician and pc support, she wears an ESP helmet to work and knows what I need before I can think to ask for it. She knows every one of my eye-rolls and is an expert in non-verbal communication. She just makes things run smoothly. We are all going to miss her.
I made this little framed picture for Kaila. She recently moved into a new apartment and got the most adorable puppy named Bella. I hope she knows it was made with love.
Tuesday, December 27, 2011
Paper piecing tutorial....better late than never!
The holidays are over and things are simmering down a bit. I feel like a human garbage can....ugh. I went to the gym this morning and felt every bite of holiday food. Anyway....
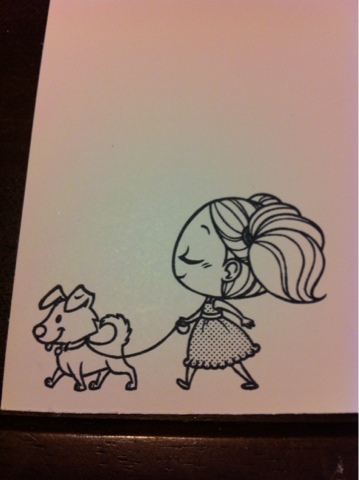
So a dear friend of mine had asked me about some paper piecing I had done and I thought I'd do a little tutorial. I'm using this ah-door-ah-bull stamp from The Greeting Farm. I stamped her on white card stock for my base and then stamped her dress on pink designer paper and I stamped the puppy again on a seperate piece of white cardstock. I cut out the dress and colored the belt. I colored the puppy with my Copic markers then cut him out. I colored my base stamp with my Copics and then glued my print dress onto the base with a glue pen. I then used foam pop dots to attach my puppy to the base being careful to line up his leash. I added an earring and a diamond tag for the pup. I adore the dimension.
Wednesday, December 21, 2011
Etching is AWESOME
Merry Christmas to all!! I've been busy as a Christmas bee trying to create little gifts and keep them all secret. Today I made little ponytail holders for Gracie (my adorable sweet Yorkie) and her puppy friends: Phoebe, Chloe and Porsche. I also made flannel flower snap clips for my dear friend Carol's daughter. But my big project today was.....(drumroll please).......etching wine glasses. If you haven't tried glass etching you are in for a real treat. I predict that by the end of next week everything glass in my house will be sporting etching of some sort!
There are etching tutorials all over the web, YouTube and my most recent addiction Pinterest. I'll give you the run down for this project but if you want something more formal there are tons available.
Supplies
Wine glasses
Vinyl (I used contact paper but you could also just use masking tape)
Armour Etch Glass Etching Cream
Paint brush
After deciding on a design I used my cricut to cut it out of my contact paper. It helps to keep in mind we are making a sticky stencil. I placed my stencil on the wine glass and used a credit card as a burnisher to ensure all the edges were stuck down well. Make sure you are in a well ventilated room. Using an old cruddy paint brush, apply the etching cream in a nice, even, slightly thick layer over your stencil. Please be careful not to get any of the etching cream on your skin and follow all precautions listed by the good folks at Armour. Let your cream get to work while you have a diet coke and a Christmas cookie ....or two. Let your etching cream sit for at least 20 min and wash your glass in warm soapy water. Peel off your stencil and prepare to ooh and ahh. That's it! You just etched glass. You ROCK!
Here are my helpful hints (read as my booboos)
Don't slosh your cream on, it can splash and make etch specks.
To get a nice end result the edges must not leak. I reinforced a few of my edges with masking tape.
Small detailed designs don't work as well.
There are etching tutorials all over the web, YouTube and my most recent addiction Pinterest. I'll give you the run down for this project but if you want something more formal there are tons available.
Supplies
Wine glasses
Vinyl (I used contact paper but you could also just use masking tape)
Armour Etch Glass Etching Cream
Paint brush
After deciding on a design I used my cricut to cut it out of my contact paper. It helps to keep in mind we are making a sticky stencil. I placed my stencil on the wine glass and used a credit card as a burnisher to ensure all the edges were stuck down well. Make sure you are in a well ventilated room. Using an old cruddy paint brush, apply the etching cream in a nice, even, slightly thick layer over your stencil. Please be careful not to get any of the etching cream on your skin and follow all precautions listed by the good folks at Armour. Let your cream get to work while you have a diet coke and a Christmas cookie ....or two. Let your etching cream sit for at least 20 min and wash your glass in warm soapy water. Peel off your stencil and prepare to ooh and ahh. That's it! You just etched glass. You ROCK!
Here are my helpful hints (read as my booboos)
Don't slosh your cream on, it can splash and make etch specks.
To get a nice end result the edges must not leak. I reinforced a few of my edges with masking tape.
Small detailed designs don't work as well.
Subscribe to:
Posts (Atom)